This is a fun project to learn the Arduino Nano and how to build your own Adjustable Temperature Monitoring and Control Device.
At the end of this project, you'll have built and programmed your very own Adjustable Thermostatic Relay and learned many new things about the Arduino Nano microcontroller, how to use a DS18B20 Waterproof Temperature Sensor, the TM1637 7-Segment 4-digit LED Display, the rotary encoder and so much more.
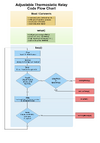
The way the adjustable thermostat works is that external DS18B20 waterproof sensor feeds the temperature in real-time to the microcontroller and then to the LED display. You can use either a short press or a long press of the rotary encoder push button shaft to set the low temperature limit (short press) or the high temperature limit (long press). Once in either of the modes, you rotate the encoder in the clockwise or counterclockwise direction to increase or decrease the temperature value. If the knob is not turned for more than 3 seconds, it exits the function and resumes displaying the real-time temperature. If the real-time temperature is either bellow or above your preset limits, the relay closes and whatever you have connected to the relay (heather, fan, etc..) is turned on.
If you are an absolute beginner, the project also includes introduction modules on the Arduino Nano, how to install the IDE (Integrated Development Environment) software, as well as a basic refresher on C++ to help the beginner level students.
The project makes it easy to follow as all the code is supplied and you to follow step-by-step instructions.
The fact that their are so many real world applications for this type of a device is compelling enough to consider doing this project. Whether you're looking for a way to keep the liquid temperature of some container between certain values, or want to cool something which is getting to hot, this practical project will help you achieve this.

