Continue to Site

Welcome to our site!

Electro Tech is an online community (with over 170,000 members) who enjoy talking about and building electronic circuits, projects and gadgets. To participate you need to register. Registration is free. Click here to register now.

  • Welcome to our site! Electro Tech is an online community (with over 170,000 members) who enjoy talking about and building electronic circuits, projects and gadgets. To participate you need to register. Registration is free. Click here to register now.

Adding a ring light to a 1981 Draper Tools PD-16 'Drilling Machine' 1981 Mascot Tools (Floor Standing Pillar Drill)

TheJay

Member
Hey everyone, I have a very old pillar drill press from 1981 (Draper). It has a green on and red off button on the side. I wondered how I can take power from the drill press when the green/black button is pressed and turn it off when the red button is pressed?
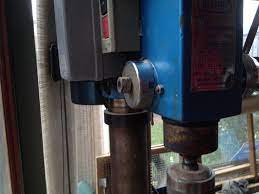
images


Even better, how could I connect a three way switch so that I can turn it on and off manually, as well as having a position for automatic.
 
Thanks for confirming, will do.

Trying to understand the switch situation.

qFuuOae.jpeg


For always on, I take the feed from the bottom contact(s) of the off button?

For motor on, I take the feed from the top contact(s) of the on button/motor?

For off?

The cables for the LED light are significantly smaller than the mains, is that a problem? If so, how to rectify? Is this what I need? Full Power Led Driver AC110-240V Dc 12V 2a 24V 1a Led Adapter or https://www.ebay.co.uk/itm/164958853389 or https://www.ebay.co.uk/itm/394682169824?itmmeta=01HXCC7AKMR641MM9F4AJ4DYRM&hash=item5be4e3f9e0:g:SEEAAOSwALFki5Sa&itmprp=enc:AQAJAAAA8G7AEIBtOLMDx2cQIM0P1Snp9xttUcmH1+bWyq5e9BfvHFUCrJuh4U2z/QX+jxdxOHBDZjYUqssGA7ebMptODrIcmjba/Qfqb6S2+wN97UN+L3sUSamTXiA7ZTuiL8wlBOBfhh0aZ7+7NwfupjnBHScTcPInZBaMQMRrZUrysJuZhNHZ09bz5fF4jW9okNYk+lllx85HPD2FgTj2oK5l5iw8+wX20l5hK4bcxigx9TP+IZkQdLpq9pwoHkm9CMeQ2of8yQ/wOdMNo69HhTPpZa1bdthNFR8WCf1ObR1lqcLSd7fyFUUbyE/qWKwU5tCJaw==|tkp:Bk9SR_6pnYzrYw ?

Lastly, what is the wiring configuration for the switch to function this way? I have that very impressive diagram from our kind member, but I really need to understand in real terms using images rather than drawings. The wiring for the LED includes a small board inside the black plastic container seen in the photo. Is that a 24-12v thing?
 
Last edited:
I tried to understand the switch diagram, I honestly don't understand it. I suspect it probably doesn't help that it's referring to lights unlike the angel ring light I have, I am not particularly experienced with diagrams and at the moment work better with descriptions/images like the one I have shared that is annotated.
 
It was a three-position switch, to take power either from after the motor switch (so the light comes on with the motor) or before it (for continuous light).
The third position has no connection, for off.

Such switches are are sometimes labelled hand-off-auto, on-off-auto or similar.

The output from that would feed whatever power supply is needed by the specific light you have.
 
It needs 12v (worked fine with two 9v batteries in parallel getting 16V), not sure on amps though. I tried to take readings yesterday and didn't have much luck.
 
Ok, looking back I now remember it's a car accessory lamp.

Any 12V power supply rated at 1A or so should be fine. It probably needs rather less current than that, but smaller PSUs may be more expensive than the commoner 1A and higher sizes.

(The only important thing about the PSU current rating is that it's at least the same as the lamp - higher is fine).

Something like this:

Or, easier to use if being wired to a switch, a block style that takes a separate AC power cable:
 
Thanks for your reply. I was hoping to take the supply from the drill press rather than using another socket. Is an LED driver the best solution from those I mentioned before?
 
So the drillpress will be 240v AC and the LED lamp is 12v DC? I don't understand why one of these wouldn't work fitted inside the drill press?

AC 240V to DC 12V 12W-60WAC 240V to DC 12V 12W-60W Dimmable Transformer Power Supply LED Driver Adapter Dimmable Transformer Power Supply LED Driver Adapter
 
The first one you previously linked to looks ok - it's just a mini 12V PSU, similar to the one from CPC:

The "LED Driver" has a very ambiguous description; it cannot "dim" at constant voltage - that needs current control. None of the modules show seem to be marked dimmable though? It's just not trustworthy, the seller does not seem to know what they are selling - so no guarantees what you may be sent!
 
So I know for future reference, what would be best if I plan to add lubricant dispenser, air, laser and potentially a bed adjustment motor? Is there a supply most of these can be connected to through the drill rather than having wires everywhere?
 
I wish you had said that to start with!

Some of those may need a 240V supply, and such as coolant would really be switched with the motor (or off manually) like the lamp, with a separate switch.

Those together likely need more current that the little no volt switch is good for..

(Those are the dubious led drivers - nowhere on those does it say dimmable?)
 
I've ordered this to drive this:
LED Driver Power Supply Transformer 240V - DC 12V for LED Lighting
image_2024-05-10_074852014.png


I did some reading and I will pass on the lubricant and laser. I might add air at some point, if I do I can look at what is needed for that when required. Table lift is a nice to have feature, I will also leave that until closer to the time.

So now I need to understand how to wire up between the switch, driver and the machine.
 
Hey everyone, I have a very old pillar drill press from 1981 (Draper). It has a green on and red off button on the side. I wondered how I can take power from the drill press when the green/black button is pressed and turn it off when the red button is pressed?

images


Even better, how could I connect a three way switch so that I can turn it on and off manually, as well as having a position for automatic.
ok this is easy you should have a DPST switch (toggle is nice), check the bottom of the switch for a legend, if not break
drillpress.png
out Your DVM in continuity mode flip the switch to one end and check between the center and one of the pins on the end no joy try the other end works ok, now flip it the switch to the other side and check the other end if It work too, then we know the center is common. please wire as per print. .if the switch is one way only the lamp comes on. the other way both do.~~ Cris H
 
Whilst awaiting a response regarding the diagram, I'm trying to paint the metal that will hold the ring light. It's not easy, I cleaned it up, used rubbing alcohol to clean and then primed using a small metal brush to apply Hammerite Primer then Hammerite Hammered Finish. The surface areas are small and the paint was not flat. I've wet sanded back to flat and I'm not sure how to approach this without getting blobs collecting around corners etc.

uuRPe85.jpg

iF5wYnd.jpg

KAF7x24.jpg


QhU1yN9.jpg
 
I'd clamp the ring so the tang (that will fit the plastic adapter) is downwards, then work top-to-bottom so the drips or runs are brushed it as you keep working down.

Also, try a barely-covering first coat over the primer & let that dry, then a second coat should hopefully run less.
 
Thanks for confirming. How do I make sure the tang also gets good coverage without making a mess? If it's clamped there will be areas paint will not go/likely clump up.
 

Latest threads

New Articles From Microcontroller Tips

Back
Top